Use Recover from the Cloud to Reinstall Windows 10 on Surface Book or Surface Pro
If you have a Surface Pro or Surface Book and disaster strikes, one of the cool features available now is to recover Windows 10 from the cloud.
One of the features I envy on Apple’s line of computers is Internet Recovery. It lets you reinstall OS X from the Internet. All that’s needed is access to a wireless network and you can have a new copy of OS X with the latest updates installed. For Windows PC’s, this has been a pipe dream; until now. Microsoft’s latest flagship devices, the recently launched Surface Pro 4 and Surface Book, include an exclusive option to reinstall Windows 10 from the web. It’s called: “Recover from the Cloud”.
Recover from the Cloud is especially handy if your recovery partition is corrupt. Microsoft has not documented the feature anywhere on its official Surface web page. So, we thought we’d show it to you. Microsoft does note, the feature is not exclusive to the Surface devices; OEMs can enable the feature on their systems, too.
Access Recover from the Cloud in Windows 10
The first thing you need to do is boot into the Windows Recovery Environment…a more robust version of Safe Mode. Shut down your device and press and hold the volume down button, and then press the power button to start the device; do not release the volume down button. When the Surface logo appears on the screen, you can release the volume down button.
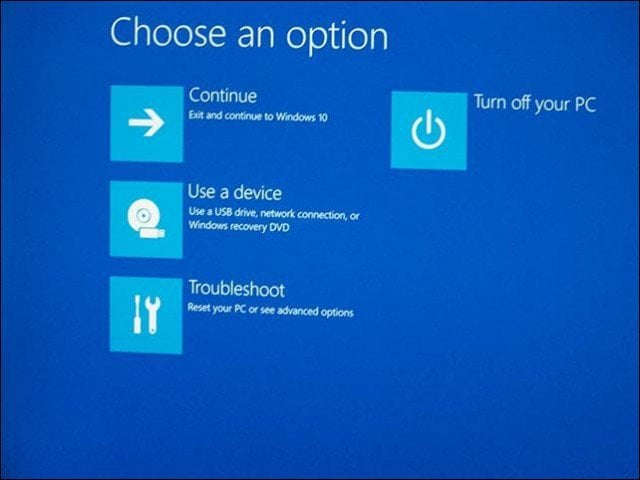
Once booted into the Windows Recovery Environment, work through the onscreen instructions. Choose your language and keyboard layout.

After that, select the Troubleshoot option.
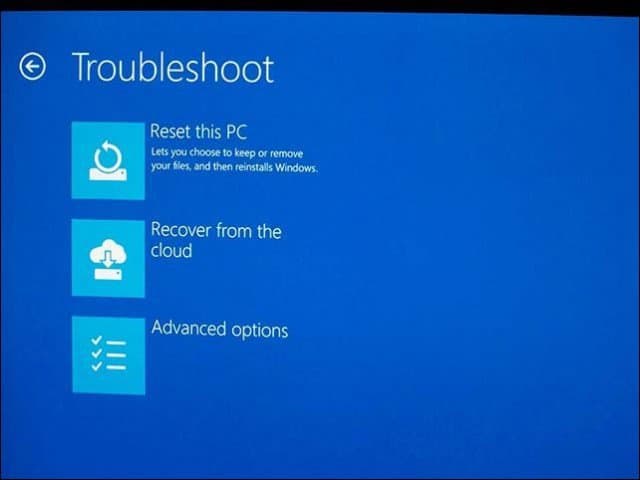
Then select Recover from the Cloud.
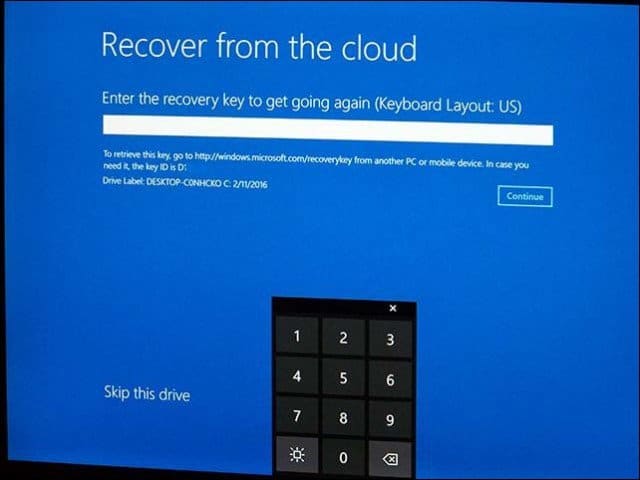
If your Surface device is encrypted, enter the recovery key to unlock it then click Continue.
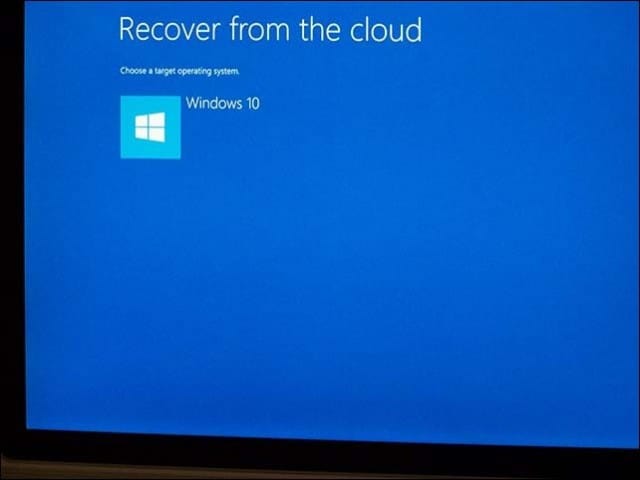
Now select the obvious choice: Windows 10.
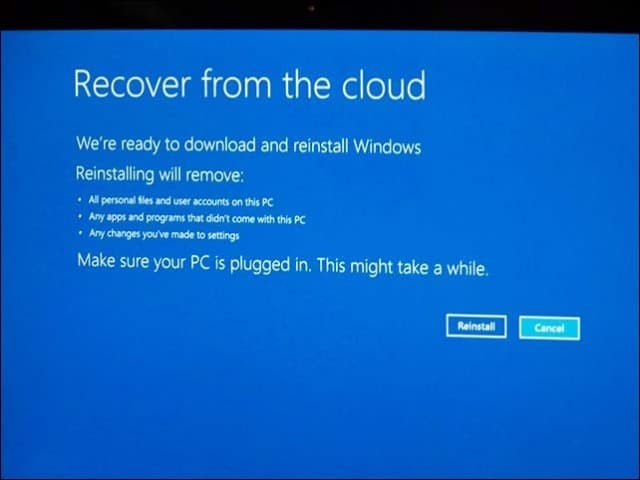
Click Reinstall to begin the recovery. This might take some time, so make sure your device is plugged in.
Remember, this will do a clean install and wipe the drive of your files, user accounts, apps, and settings.
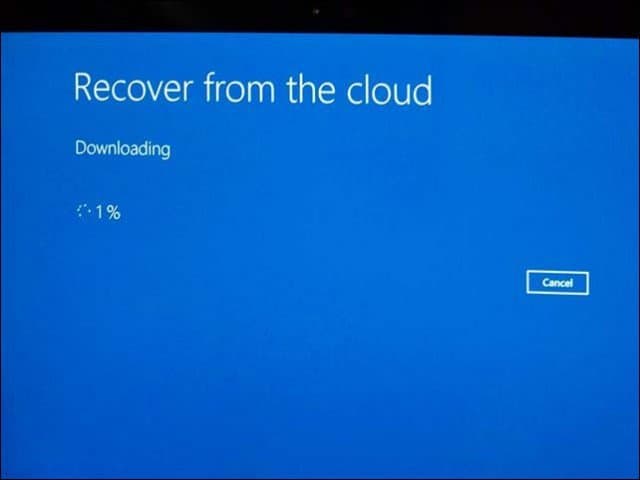
Then wait while your device is recovered from the cloud. Again, this can take quite a while and each user’s experience will vary.
Some early adopters of Surface Book and Surface Pro 4, have reported needing to perform a Recover from Cloud, in order to have the device function properly. Apparently, out of the box configurations might have issues with Windows 10 image used at the factory. If you bought a Surface Pro 3 preinstalled with Windows 10, the Recover from the Cloud feature might be available on your device, too.
Oregonjohn
February 24, 2016 at 7:35 am
Would work with Surface RT
Andre Da Costa
February 25, 2016 at 1:06 pm
No, this is a new unique feature of the Surface Pro 4 and Surface Book. Some early model Surface Pro 3’s that came preinstalled with Windows 10 might be able to use this feature.
Oregonjohn
February 26, 2016 at 2:04 am
Thanks, might have know as it was not upgradable to win 10.
Andrew
June 13, 2016 at 7:04 am
Very cool – definitely needs more documentation
Keith Weisshar
July 28, 2016 at 12:47 pm
Do I still need a USB recovery drive to access Recover from the Cloud if the SSD is erased using Parted Magic?
Keith Weisshar
July 28, 2016 at 12:56 pm
Is there a way to Recover Surface Book from the Cloud after erasing the drive with the bootable Microsoft Surface Data Eraser USB?
Andre Da Costa
February 14, 2017 at 3:34 pm
Your best option is to download and create a recovery image.
Paul
March 22, 2017 at 9:19 am
this is a nice feature…however on my pro 4 when i want to do this it cannot connect to my network! anyone experiencing the same problem?
Master
March 30, 2017 at 5:52 pm
I can’t connect to my wifi. It says it failed. I tried other wifi networks and same thing.
MSFT is a joke. No QC anymore.
KoldPhire
April 7, 2017 at 12:42 am
Same issue. Can’t connect to wifi network. This is the second Surface I’ve had under warranty replacement. I regret buying this horrible product.
ED
April 18, 2017 at 6:53 am
Hi, I agree with KoldPhire. We bought 14 Microsoft Surface 4 PRO for our employees. 2 of them faulty , rest are full of glitches. Wanted to do cloud recovery. Wi-Fi doesnt connect to NONE of them under cloud recovery section.
This is the second time i am so disappointed on Microsoft. the first time was – Windows Vista of course.
I do not recommend this device to anyone. Yes it looks awesome! but i didn’t want to pay over 1k for device which just doesn’t work.
Christian Parker
June 8, 2017 at 11:15 am
What happens if you accidentally click on skip this drive?
nathan
October 1, 2017 at 9:57 pm
Mine wouldn’t connect to my wifi even when I made it so no password was needed. I have Comcast and it connected to the public “xfinity” wifi.
nathan
October 2, 2017 at 5:34 pm
I’m looking to sell my Surface Pro 4. I tried recover from cloud but it kept giving me messages saying it couldnt delete all personal stuff. I finally succeeded in returning my Surface Pro 4 to factory new setting by using a USB stick and following these steps:
https://support.microsoft.com/en-us/surfacerecoveryimage
Then I went to this Microsoft page and deleted the Surface Pro 4 from my list of registered devices.
https://account.microsoft.com/devices .
I’m not entirely sure if this’ll work untill it’s sold. I’m not a computer nerd. Hope this helps.
AlainCh2
October 18, 2019 at 4:58 am
OK, two solution>
1) Not mine but it work> Ctrl+ScrollWheel (try up or down till you got them back)
2) Got the luck and found the exact problem:
Taskbar setting “hide in desktop mode” get unchecked when this happens
(no reason given)
so… I go to Taskbar setting, recheck it and instantly the icons goes back in main display.
(no reason given)
I never found this solution on the web.
Found it on my own by chance few months ago
(we can agree: Windows10 sucks)
Hope it help
Alain